📤 An in-depth introduction to Git command line operations
I. Introduction to Git 📚
GitHub is the world's largest code hosting platform. It provides code hosting services based on Git, a version control system.
Version control is a system that records changes in the content of one or several files so that you can check the revision of a specific version in the future.
1. History of Git 🕰️
The Linux kernel open source project has a large number of participants, but most of the Linux kernel maintenance work is spent on the tedious affairs of submitting patches and saving archives (1991-2002). By 2002, the entire project team began using a proprietary distributed version control system called BitKeeper to manage and maintain the code.
BitKeeper was a proprietary and paid-for tool at the time, but the Linux development crew were allowed to use it for free… until BitKeeper founder Larry McVoy took issue with one of the Linux developers over inappropriate use of BitKeeper.
By 2005, the partnership between the commercial companies that developed BitKeeper and the Linux kernel open source community ended, and they took back the Linux kernel community's right to use BitKeeper for free.
In 2005, Linus Torvalds urgently needed a new version control system to maintain the development of the Linux Kernel. So he went offline for a week, wrote a revolutionary new system from scratch, and called it Git.
Since its inception in 2005, Git has matured and become highly user-friendly 💻 while still maintaining the goals set in the beginning. It's fast ⏱️, perfect for managing large projects 🗂️, and has an incredibly non-linear branch management system 🌈.
2. Features of Git ✨
-
High Performance: Efficient compression algorithm, saving storage space 💾, fast branch operation ⚡, almost instantaneous branch switching ⏱️, excellent storage mechanism to avoid storing duplicate content 🚫, high network transmission efficiency, only transmit differential content 📡.
-
Distributed Version Control: Git is a distributed version control system, meaning every developer has a complete copy of the code repository 🗂️ and does not need to rely on a central server to work, supporting offline development 📵, improving the reliability of the system and avoiding a single point of failure ⚠️.
-
Data Integrity Assurance: The SHA-1 hashing algorithm is used to ensure data integrity 🔐, generating a unique hash value for each commit to ensure that the code history cannot be tampered with 📜, providing reliable code traceability 🔍, and any changes in the file will be accurately recorded. In fact, the information stored in the Git database is indexed as a hash of the file's contents, not the file name 🏷️.
-
Ideal for Collaborative Team Development: Complete remote repository support 🌍, convenient code push and pull mechanisms 🔄, and built-in conflict resolution tools 🛠️.
II. Installation and Configuration 💾
1. Installation Methods for Different Platforms 🖥️
2. Initial Configuration 🛠️
Git comes with a tool called git config to help set up Git configuration.
# View all configurations
git config --list
User Information Configuration
Mainly used to identify identity, each commit needs to identify the author, track code contributors, and distinguish between different developers' commits.
# Configure username (replace Github Username)
git config --global user.name "Github Username"

# Configure email (replace Github Email)
git config --global user.email "Github Email"
SSH Configuration
- Encrypt remote repository communication, secure authentication
- Avoid repeatedly entering passwords, password-free repository push and pull
# Generate SSH key (replace Github Email)
ssh-keygen -t rsa -b 4096 -C "Github Email"
# View public key, copy the content
cat ~/.ssh/id_rsa.pub
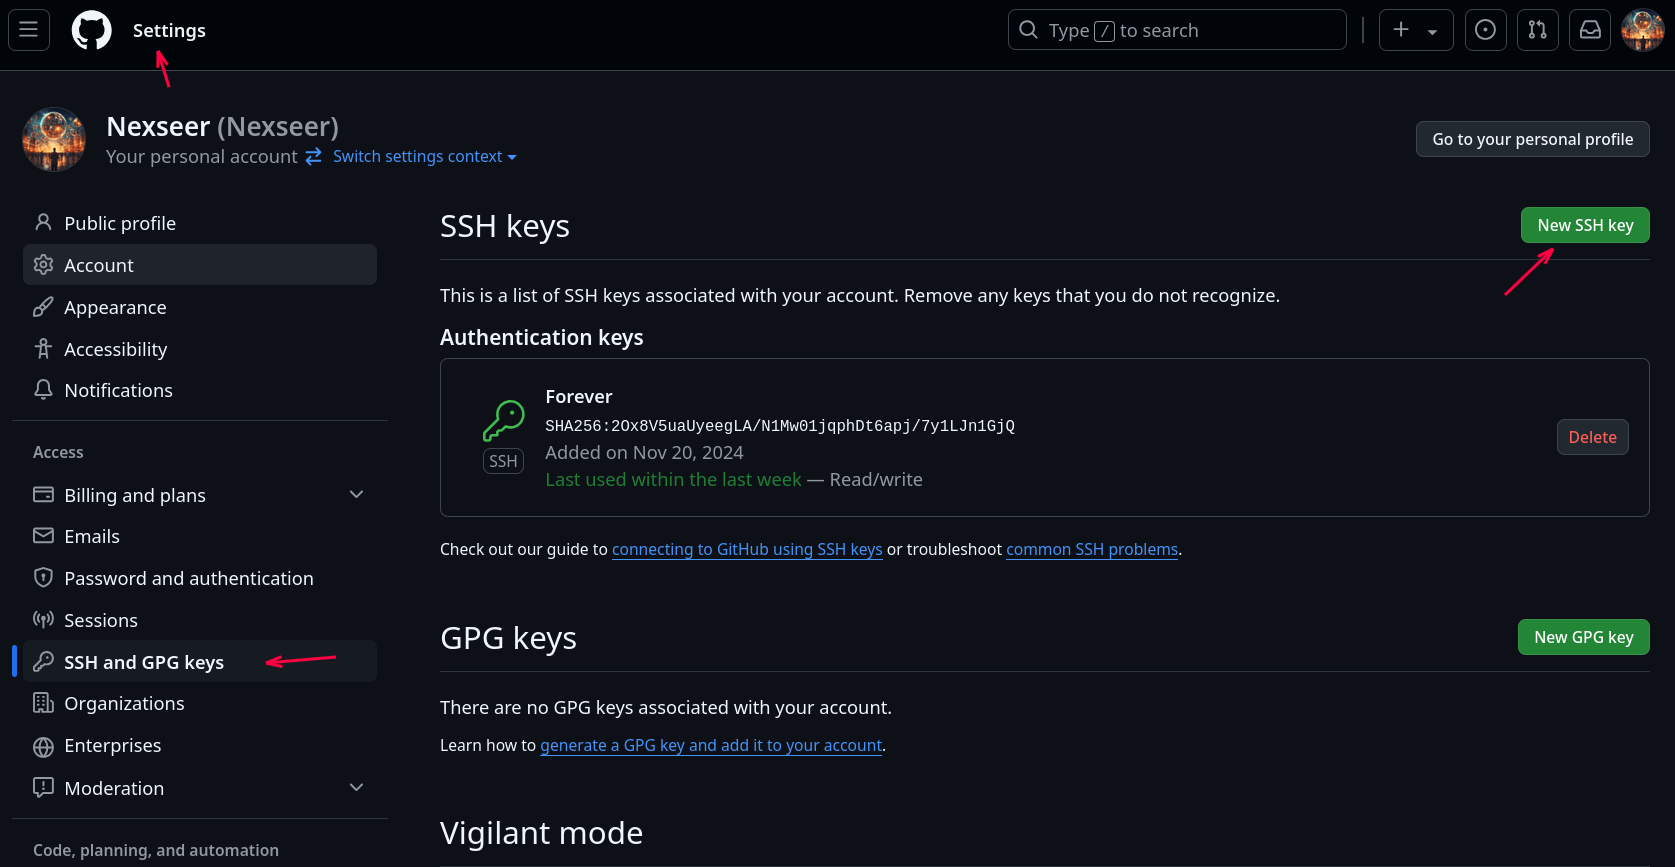
# Add SSH public key on platforms like GitHub (see image below ⬇️)
# Test SSH connection
ssh -T git@github.com
To resolve the issue "ssh: connect to host github.com port 22: Connection refused" 🤔
You can add the following content to the ~/.ssh/config file. This way, SSH will use port 443 when connecting to GitHub.
Host github.com
    Hostname ssh.github.com
    Port 443
Configuration Levels
Git has three configuration levels, with priority from high to low:
-
Local Level
- Only affects the current repository
- Configuration file location:
.git/config - Command:
git config --local
-
Global Level
- Affects all repositories for the current user
- Configuration file location:
~/.gitconfig - Command:
git config --global
-
System Level
- Affects all users on the system
- Configuration file location:
/etc/gitconfig - Command:
git config --system
3. Common Configuration Commands ⚙️
# View specific Git configuration (replace <key>)
git config <key>
# git config user.name

# Delete specific configuration (replace <key>)
git config --global --unset <key>
# git config --global --unset user.name

# Text editor: Git calls this when it needs you to input information. If not configured, Git uses system default text editor. (e.g., using nvim editor)
git config --global core.editor nvim

# Directly edit global configuration file
git config --global --edit

# Get help for specific Git commands or subcommands (replace <verb>)
git help <verb>
git <verb> --help
man git-<verb>
# git help config
Proxy settings (if needed, replace proxy.example.com and port)
# Set HTTP proxy
git config --global http.proxy http://proxy.example.com:port

# Set HTTPS proxy
git config --global https.proxy https://proxy.example.com:port
III. Git Basics 🧩
1. Git States 🚦
Files in Git can be in one of three states: committed, modified, and staged.
- Committed means the data is safely stored in your local database.
- Modified means you've changed the file but haven't committed it to your database yet.
- Staged means you've marked a modified file to go into your next commit snapshot.
2. Git Working Areas 🗂️
Working Directory
The actual location where project files are stored, where developers directly edit code, containing all source files and directories of the project.
Features 🎨:
- Untracked files exist here by default
- Can see actual project files
- Directly reflects the current state of code
# Check working directory status
git status
Staging Area
Temporarily stores modifications that will be committed, located in the index file under the .git directory, serving as an intermediate state between the working directory and local repository.
Features 🎨:
- Can precisely control what to commit
- Allows partial file commits
- Provides opportunity for code review
# Add files to staging area (replace <file>)
git add <file>
Local Repository
Stores complete project history, located in the .git directory in project root, contains all commit information and branches.
Features 🎨:
- Completely stores all version history of the project
- Supports version rollback and branch management
- Can work completely offline
# Commit to local repository (replace commit message)
git commit -m "commit message"

# View commit history
git log
Remote Repository
Code repository hosted on network servers like GitHub, GitLab, Gitee, used for code sharing and multi-person collaboration.
Features 🎨:
- Provides code backup
- Supports multi-person collaborative development
- Can host open source or private projects
# Clone remote repository (replace <repository-url>)
git clone <repository-url>

# Push code to remote repository (replace <branch>)
git push origin <branch>

# Pull code from remote repository (replace <branch>)
git pull origin <branch>
3. Workflow Example 🔄
Working Directory → Staging Area → Local Repository → Remote Repository
# 1. Modify file in working directory
vim README.md

# 2. Add modifications to staging area
git add README.md

# 3. Commit to local repository
git commit -m "Update README"

# 4. Push to remote repository
git push origin main
These four areas 🔄 form the core mechanism of Git version control, providing a flexible and efficient way of 📂 code management. Understanding these areas and their interactions is crucial for proficient Git usage.
IV. Basic Git Operations 🖱️
1. Getting a Git Repository 📦
There are two ways to get a Git repository: first is initializing a repository locally (git init); second is cloning an existing Git repository from a server (git clone).
| Feature | Initialize (git init) | Clone (git clone) |
|---|---|---|
| Use Case | New project | Existing project |
| Project History | Start from scratch | Get complete history |
| Remote Repository | Need manual addition | Automatically linked |
Initializing a Repository
git init
Can be done in an empty directory or in a folder with existing files. This command will create a subdirectory named .git to track versions - this is the core of Git repository, recording all history and state information.
Cloning a Repository
# Basic clone command (replace <repository-url>)
git clone <repository-url>

# Clone and specify local directory name (replace <repository-url> <local directory name>)
git clone <repository-url> <local directory name>

# Clone only the most recent commit (shallow clone) (replace <repository-url>)
git clone --depth 1 <repository-url>
# Clone last n commits
git clone --depth n <repository-url>

# Clone specific branch (replace <branch> <repository-url>)
git clone -b <branch> <repository-url>
Two main protocols are used: HTTPS is preferred for public projects, SSH is recommended for development projects.
| Default Port | 443 | 22 |
|---|---|---|
| Security | Medium | High |
| Firewall Passage | Very Good | May be Limited |
| Authentication | Username/Password | Key Pair |
| Initial Setup | Simple | Requires key generation and configuration |
| Each Operation | Requires credentials | Password-free |
| Use Case | Public networks, temporary use | Private environments, frequent operations |
git clone https://github.com/username/repository.git
git clone git@github.com:username/repository.git
2. Adding Files (git add) ➕
# Add single file to staging area (replace <file>)
git add <file>

# Add multiple specified files (replace <filen>)
git add <file1> <file2> <file3>

# Add all new files and modifications in current directory
git add .

# Add all changes including new, modified, and deleted files
git add -A
# Equivalent to
git add --all

# Add only modifications to tracked files
git add -u

# Interactive selection
git add -p
.gitignore Syntax
.gitignore is a text file that tells Git which files or directories should not be version controlled. Proper configuration can greatly simplify Git usage and keep the repository clean. It only affects untracked files.
Ignoring Files/Directories
# Ignore specific files
secret.txt
passwords.json

# Ignore specific directories
logs/
temp/

# Ignore all .log files
*.log

# Ignore all files in specific directory
build/*
Wildcard Usage
# * matches multiple characters
*.txt       # all .txt files
*.log       # all log files

# ? matches single character
test?.txt   # matches test1.txt, testa.txt, but not test10.txt

# ** matches multiple directory levels
**/logs     # logs directory at any level
Negation Rules
# Ignore all .log files except important.log
*.log
!important.log
3. Committing Changes (git commit) ✅
# Basic commit (replace commit message)
git commit -m "commit message"

# Multi-line commit message (replace "...")
git commit -m "feat: Add user authentication module
- Implement user registration
- Add login verification logic
- Integrate third-party authentication"

# Directly commit all tracked modified files (replace commit message)
git commit -a -m "commit message"

# Modify the most recent commit message (replace commit message)
git commit --amend -m "commit message"

# Merge new changes into the last commit without modifying commit message
git commit --amend --no-edit

# Open editor to write more detailed commit message
git commit
4. Checking Status (git status) 👀
# Concise output
git status -s
git status --short

# Show branch information
git status -b
git status --branch
Output Information Types
# Unmodified status
nothing to commit, working tree clean

# Untracked files
Untracked files:
  (use "git add <file>..." to include in what will be committed)
    new_file.txt

# Staged files
Changes to be committed:
  (use "git reset HEAD <file>..." to unstage)
    new file:   staged_new_file.txt
    modified:   staged_modified_file.txt
5. Viewing Differences (git diff) 🔍
# Compare working directory and staging area, show unstaged file modifications
git diff

# Compare staging area and most recent commit
git diff --staged
git diff --cached

# Compare two commits (replace <commit1> <commit2>)
git diff <commit1> <commit2>

# View differences for specific file (replace <file>)
git diff <file>

# Show brief statistics
git diff --stat
6. Viewing Logs (git log) 📝
Helps you track project changes and development trajectory.
Standard log view git log
- Shows all commits in reverse chronological order
- Includes complete commit hash, author, date, and commit message
Concise log git log --oneline
- Each commit shown on one line
- Shows short hash and commit message
# Show last 5 commits
git log -n 5

# Filter by author (replace username)
git log --author="username"

# Filter by date range (replace "date")
git log --since="2023-01-01" --until="2023-12-31"

# View commit history
git log --graph --oneline --all
git log --graph --oneline develop

# View commit and author of last modification for each line in file (replace <file>)
git blame <file>
7. Undoing Changes 🔙
git checkout
Use
--to separate filenames to avoid conflicts with branch names
# Discard changes in working directory for a file (replace <file>)
git checkout -- <file>

# Discard all unstaged changes, use with caution
git checkout -- .

# Switch branches (can also discard changes) (replace <branch>)
git checkout <branch>
git reset
HEAD is a pointer that references the current branch, always pointing to the last commit on that branch. This means HEAD will be the parent of your next commit.
Usually, the simplest way to understand HEAD is to think of it as a snapshot of your last commit. HEAD~1 is a reference method used to indicate the commit before the current HEAD (i.e., the previous commit).
Resets the HEAD pointer of the current branch, can change commit history.
# Unstage files, remove files from staging area but keep working directory modifications (replace <file>)
git reset <file>

# Soft reset: preserve working directory and staging area changes
git reset --soft HEAD~1

# Mixed reset (default): preserve working directory, clear staging area
git reset HEAD~1

# Hard reset: completely discard all changes
git reset --hard HEAD~1
Reset Mode Comparison:
| Mode | Working Directory | Staging Area | Commit History |
|---|---|---|---|
| --soft | Unchanged | Unchanged | Reset |
| --mixed (default) | Unchanged | Cleared | Reset |
| --hard | Cleared | Cleared | Reset |
git revert
Creates a new commit that undoes changes from specified commit, doesn't alter commit history.
# Revert most recent commit
git revert HEAD

# Revert specific commit by hash (replace <commit-hash>)
git revert <commit-hash>

# Revert last 3 commits
git revert HEAD~2..HEAD
Summary
- Local modifications: use
git checkout - Staged but not committed: use
git reset - Pushed commits: use
git revert
| Scenario | git checkout | git reset | git revert |
|---|---|---|---|
| Undo local unstaged changes | ✅ | ❌ | ❌ |
| Unstage files | ❌ | ✅ | ❌ |
| Roll back unpushed local commits | ❌ | ✅ | ✅ |
| Undo pushed commits | ❌ | ❌ | ✅ |
V. Branch Management 🌿
1. Branch Concept 🌳
A branch is a movable pointer to a commit. It allows you to make modifications and experiments without affecting the main branch (usually main). Each branch is an independent line of development in the code repository where you can make commits, merges, and other operations.
2. Branch Operations ✂️
# View local branches
git branch

# View all branches (including remote)
git branch -a

# View last commit of each branch
git branch -v

# Create new branch (replace <branch>)
git branch <branch>

# Create and switch to new branch (replace <branch>)
git checkout -b <branch>

# Create branch based on specific commit (replace <commit-hash>)
git branch <branch> <commit-hash>

# Switch branch (replace <branch>)
git checkout <branch>

# Quickly switch to previous branch
git checkout -

# Force switch (discard uncommitted changes) (replace <branch>)
git checkout -f <branch>

# Merge other branch into current branch (replace <branch>)
git merge <branch>

# Merge using rebase method (replace <branch>)
git merge --rebase <branch>

# Squash merge (combine into single commit) (replace <branch>)
git merge --squash <branch>

# Delete merged local branch (replace <branch>)
git branch -d <branch>

# Force delete branch (unmerged) (replace <branch>)
git branch -D <branch>

# Delete remote branch (replace <branch>)
git push origin --delete <branch>
3. Branch Strategy 🗺️
Version management branches help manage different versions of the project:
- Main branch (main) typically stores stable versions
- Development branch (develop) used for integrating new features
- Feature branches (feature) used for developing new features
- Release branches (release) can prepare new versions
- Hotfix branches (hotfix) used for urgent bug fixes
VI. Remote Repository Operations 🌐
1. Viewing Remote Repositories 🔭
originis Git's default name for the server you cloned from.
# View remote repository servers
git remote

# View Git's saved abbreviations and corresponding URLs for remote repositories
git remote -v

# View details of specified remote repository
git remote show origin

# Rename remote repository (replace <old-name> <new-name>)
git remote rename <old-name> <new-name>

# Remove remote repository association (replace <remote-name>)
git remote remove <remote-name>
2. Adding Remote Repositories ➕
# Add remote repository (replace <remote-name> <repository-url>)
git remote add <remote-name> <repository-url>
3. Pushing to Remote (git push) ⬆️
# Standard push (replace <remote-name> <branch>)
git push <remote-name> <branch>
# git push origin main

# First push and establish upstream branch link (replace <remote-name> <branch>)
git push -u <remote-name> <branch>
# git push -u origin main

# Force push (use with caution) (replace <remote-name> <branch>)
git push -f <remote-name> <branch>
# git push -f origin main

# Push all branches (replace <remote-name>)
git push --all <remote-name>
# git push --all origin

# Push all tags (replace <remote-name>)
git push --tags <remote-name>

# Delete remote branch (replace <remote-name> <branch>)
git push <remote-name> --delete <branch>
# git push origin --delete <branch>
4. Fetching from Remote (git fetch) ⬇️
# Get remote repository updates (replace <remote-name>)
git fetch <remote-name>
# git fetch origin

# Fetch specific branch (replace <remote-name> <branch>)
git fetch <remote-name> <branch>

# Fetch all remote repositories and branches
git fetch --all
5. Pulling Updates (git pull) 🔄
# Basic pull (replace <remote-name> <branch>)
git pull <remote-name> <branch>
# git pull origin main

# Pull and rebase (replace <remote-name> <branch>)
git pull --rebase <remote-name> <branch>
# git pull --rebase origin main

# Pull using rebase method (recommended)
git pull --rebase

# Pull without merging
git pull --no-commit

# Force overwrite local changes
git pull -f
6. Remote Branch Management 🌍
# List all remote branches
git branch -r

# View local and remote branches
git branch -a

# Create local branch based on remote branch (replace <local-branch> <remote-name> <branch>)
git checkout -b <local-branch> <remote-name>/<remote-branch>

# Set local branch to track remote branch (replace <remote-name> <branch>)
git branch -u <remote-name>/<remote-branch>
7. Summary 📋
| Command | Purpose | Modifies Local Code | Downloads Remote Updates |
|---|---|---|---|
| git fetch | Only download remote updates | No | Yes |
| git pull | Download and merge updates | Yes | Yes |
| git push | Push local updates | No | No |
VII. Advanced Git Techniques 🚀
1. Git Aliases 🏷️
If you don't want to type complete Git commands every time, you can use git config to set aliases for needed commands.
# Replace <alias-name> <git-command>
git config --global alias.<alias-name> <git-command>
# git config --global alias.co checkout
# git config --global alias.br branch
# git config --global alias.ci commit
# git config --global alias.st status
# git config --global alias.unstage 'reset HEAD --'
For example, when you want to type git commit, you only need to type git ci.
The above operation will make the following two commands equivalent:
git unstage fileA
git reset HEAD -- fileA
2. Tag Management (git tag) 🏁
Git tags are a way to permanently bookmark specific commits, typically used to mark version release points.
By mastering Git tag usage, you can better manage project versions, track important release milestones, and provide clear version references for team collaboration.
major.minor.patch
Example: v1.2.3
- 1: Major version (significant changes)
- 2: Minor version (new features)
- 3: Patch version (bug fixes)
# Create lightweight tag (replace <tag-name>)
git tag <tag-name>
# git tag v1.0.0

# Create annotated tag (replace <tag-name> <message>)
git tag -a <tag-name> -m "<message>"
# git tag -a v1.0.0 -m "Version description"

# Tag specific commit (replace <tag-name> <commit>)
git tag <tag-name> <commit>

# List tags
git tag

# Search tags with specific pattern (replace <pattern>)
git tag -l '<pattern>'
# git tag -l 'v1.8.5*'

# Push tags (replace <remote-name> <tag-name>)
git push <remote-name> <tag-name>
# git push origin v1.0.0

# Delete tag (replace <tag-name>)
git tag -d <tag-name>
# git tag -d v1.0.0
3. Stashing (git stash) 📦
Used to temporarily save incomplete modifications in the current working directory (saves current uncommitted changes - both staged and unstaged), while restoring the working directory to a clean state of the last commit. This is very useful when you need to quickly switch branches or handle other urgent tasks.
- Stash only stores tracked files
- New untracked files need to be
git addfirst - Conflicting stashes may need manual resolution
# Basic stash
git stash

# Stash with description (replace <message>)
git stash save "<message>"

# View stash list
# Each stash has a unique identifier
git stash list

# Apply and remove most recent stash
git stash pop

# Apply but keep stash
git stash apply

# Clear all stashes
git stash clear

# Create branch from stash, applying the most recent stash to this new branch, automatically deleting the stash if successful (replace <branch>)
git stash branch <branch>
When developing a feature and suddenly need to switch branches:
# Save current incomplete work
git stash

# Switch to other branch (replace <another-branch>)
git checkout <another-branch>

# After completing other work, return and restore previous work (replace <original-branch>)
git checkout <original-branch>
git stash pop
Save and manage multiple stashes:
# Create multiple stashes
git stash save "Feature A incomplete"
git stash save "Feature B debugging"

# View all stashes
git stash list

# Apply specific stash
# stash@{1} refers to the second stash you see in git stash list (as index starts from 0)
git stash apply stash@{1}
4. Submodules (git submodule) 🧩
Submodules are essentially pointers to specific commits, a mechanism for managing one Git repository within another Git repository. It allows you to include one Git repository as a subdirectory of another Git repository while maintaining the independence of both repositories. This is very useful for managing complex project dependencies and code reuse, but submodule updates need to be handled carefully to avoid accidentally introducing incompatible code.
- Submodules always point to a specific commit, not the latest state of a branch
- Submodule updates require explicit operations
- Need to pay attention to submodule synchronization in multi-person collaboration
# Add submodule (replace <repository-url> <path>)
git submodule add <repository-url> <path>
# git submodule add https://github.com/nlohmann/json.git libs/json

# Initialize local configuration file
git submodule init

# Initialize specific submodule (replace <path/to/submodule>)
git submodule init <path/to/submodule>
# git submodule init libs/json

# Update all submodules to specific commits recorded in main project
git submodule update

# Update and initialize
git submodule update --init

# Recursively update nested submodules
git submodule update --init --recursive

# Clone main repository and initialize all submodules (replace <repository-url>)
git clone --recurse-submodules <repository-url>

# Update all submodules to latest commits in their remote repositories
git submodule update --remote

# Synchronize all submodule remote URLs
git submodule sync

# Synchronize specific submodule (replace <path/to/submodule>)
git submodule sync <path/to/submodule>
# git submodule sync libs/json

# Remove submodule (replace <path/to/submodule>)
git submodule deinit <path/to/submodule>
# git submodule deinit libs/json

# Remove submodule from version control (replace <path/to/submodule>)
git submodule rm <path/to/submodule>
# git rm libs/json
Initializing submodules serves to set up the submodule directory as a Git repository and prepare it for subsequent operations (such as pulling, updating, etc.). Without initialization, the submodule directory will be empty and cannot perform version control operations.